This article introduces how to edit milky way (or starry sky) photo taken with RAW data in adobe lightroom.
Why do we have to take it with RAW data?
First, let's take a look at the difference between JPEG and RAW
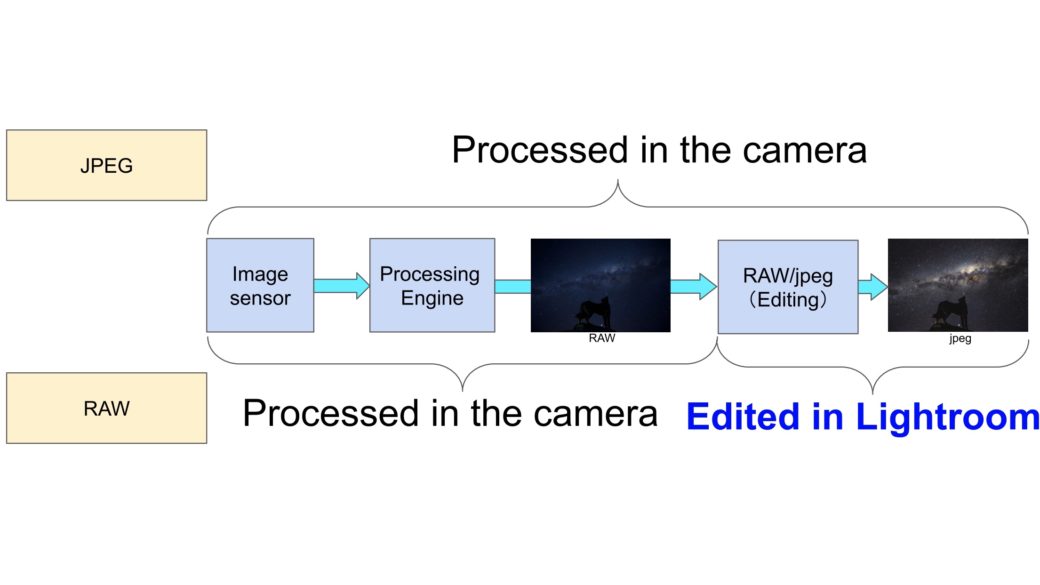
The image captured by the image sensor is converted into image data via the image processing engine. And this is RAW data. Ultimately, it is common to create a jpeg file that can be viewed on a variety of electronic devices. The difference between shooting with jpeg and shooting with RAW is Who(Camera or you with PC) processes editing the image from RAW to jpeg.
If you are satisfied with the photos you took with jpeg, of course you'd better shoot with jpeg beacause there are no complicated steps.
However, in special circumstances such as the starry sky, shooting with jpeg is extremely difficult, so shoot with RAW data and then, edit in lightroom. Also, since jpeg is a compressed file, the color information is overwhelmingly less than the original RAW data. If you try to edit it later, the adjustable range will be narrowed, so it is recommended that you always obtain RAW data when shooting in the starry sky.
Lightroom is the best tool to edit
Software is required to process RAW data. Some are included with the camera and some are free, but Adobe Lightroom is recommended.
The reasons are as follows.
①De facto standard for development software
②High compatibility with each software
③Lens profiles are abundant and updated frequently
④Photoshop can also be used in subscription contracts
①It is no exaggeration to say that most people using RAW development use Lightroom. There is software that you can use for free, but you can't leave Lightroom after viewing the finished photos with it.
②Because it is classic, photo-related software can often be linked to Lightroom regardless of Adobe products. For example, you can use a third-party software called LRTimelapse which is very useful for creating time-lapse movies.
③Lightroom stores profiles of most lenses which are on the market. This allows you to apply unique distortion correction and vignette correction to individual lenses with a click. This is very convenient. In addition, it is updated frequently.
④Recently, subscriptions for various services (It can be canceled when you want to end monthly) have become mainstream. Lighroom is sold as one of Creative Cloud Photo Plan with Photoshop.(US$9.99/month)
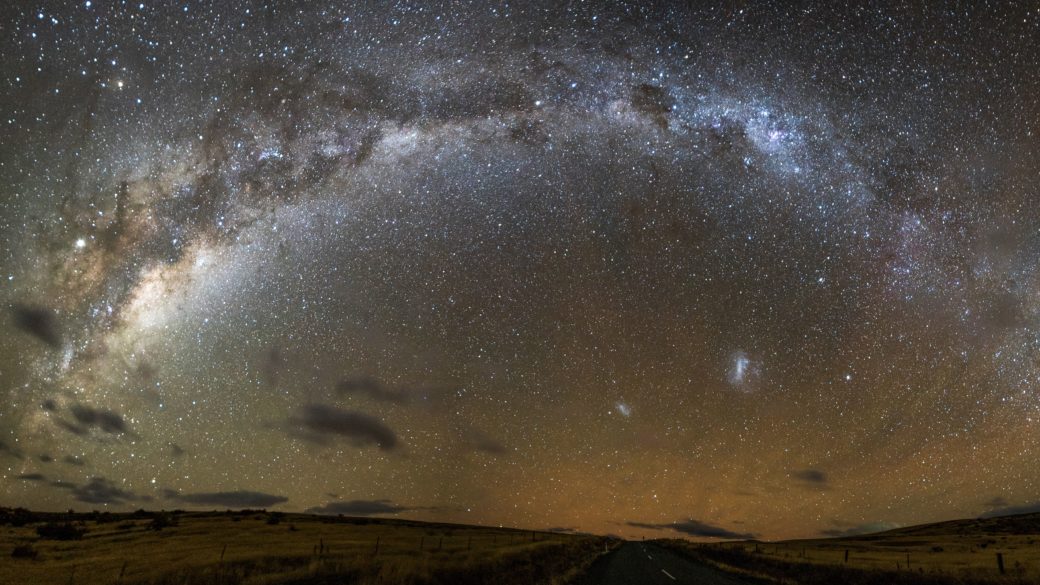
You can easily create a panoramic composition that combines multiple photos as shown below, or you can create a time-lapse movie using Photoshop.
You can also use other cloud services. This is very useful when using Lightroom on multiple devices.
The link below.
If you choose a photo plan, you can use Lightroom and Photoshop for US$9.99/month. There is also a 7-day free trial version, so if you're unable to make a decision , just try it.
Procedures for editing
I took a video for clarity. Please watch the following. Also, I did it for recording on the iPhone, but I think that there is no problem because the desktop version has the same function. Please contact me if you have any questions.
Conclusion
This time, I introduced how to edit milky way (or starry sky) photo in adobe Lightroom. In retrospect, photography has become so much fun since I started RAW editing in Lightroom. As you try, RAW editing skill improves.
【Recommended Articles】
How to Shoot Starry Sky Photos
Best Destinations in Hokkaido, Japan
Give Some Stories To Your Works
How to write or read data on external HDD or SSD from your iPad

 How to Shoot Starry Sky Photos
 【Review】iPad Pro for Photo and Video Editing
 Location Hunting is The Most Important Thing to Watch and Shoot Starry Sky
 Mystic Optical Phenomenon Called Airglow in Tekapo, New Zealand